Monday, March 18, 2013

Ratchet and Clank: Full Frontal Assault: Phoenix II Exterior

The Phoenix II Exterior required a large set of tactics to make it work. The ship was a massive object but also had to look good up close as it was featured in many cinematics. In order to meet all of our needs I utilized skills from all of my areas of expertise including character, environment, and fx.
The Phoenix II
Modeled in Maya/Zbrush
Textured in Photoshop


Friday, March 15, 2013

Ratchet and Clank: Full Frontal Assault: Phoenix II Level

The Phoenix II level was created as a three stage hub for the players to return to throughout the game. The ship becomes infected with a virus and slowly degrades over the course of the story.

Sean Kwon and Nathaniel Bell did a large portion of the base geometry and basic textures. I went through afterwards and did a large polish pass finishing shaders, adding/cleaning up geometry where necessary including some interiors and props, building the skydome, and adding a suite of fx for each stage.

Phoenix Phase 1


Phoenix Phase 2


Phoenix Phase 3


Tuesday, February 26, 2013

Ratchet and Clank: All 4 One Vehicle Props

Built in Maya and Zbrush
Textured in Photoshop and Zbrush

Seaside Derelict Ship


Ornithopter Starship


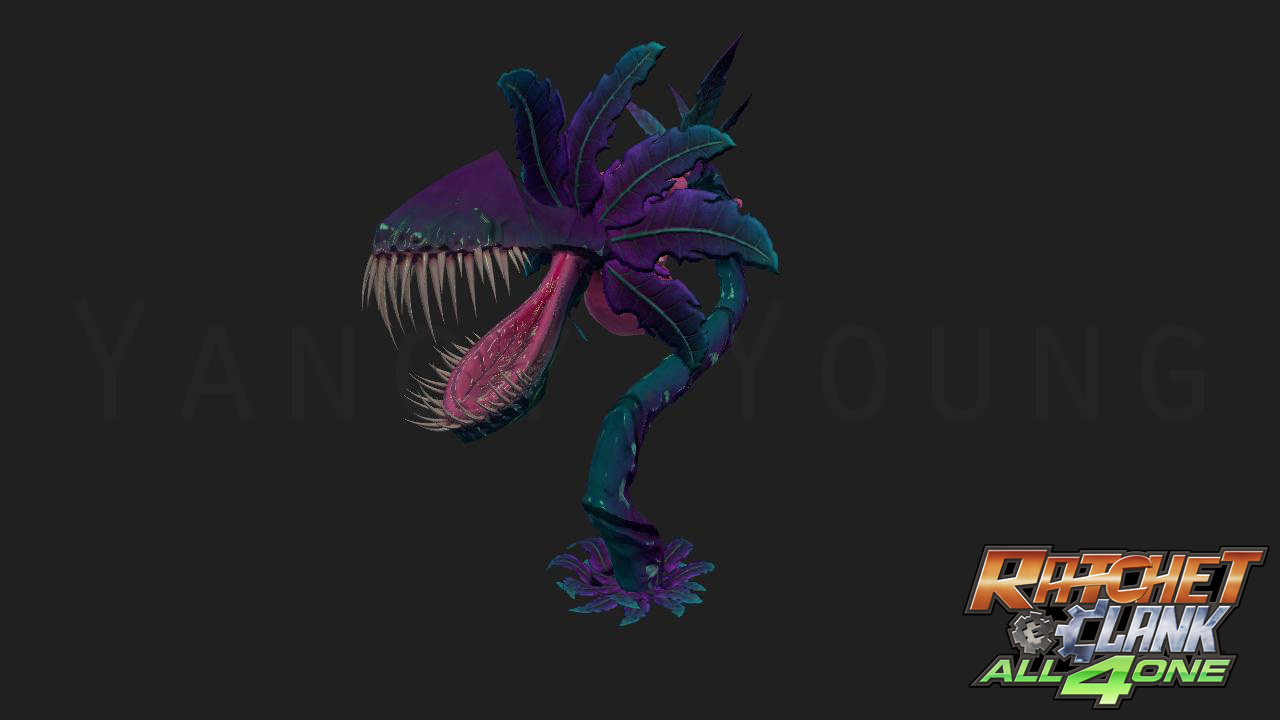
Ratchet and Clank: All 4 One Characters

Characters built in Maya and Zbrush
Textured in Zbrush and Photoshop

Jellyfish Enemy


Armored Jellyfish Enemy


Carnivine Plant Enemy


Saturday, August 22, 2009

Resistance 2 Pride and Joy


This is our version of the Sabre. I don't have much to say except for this was and still is my favorite piece. It was my first ever vehicle and I can't thank everyone enough who helped me during the time I was working on it. Love this plane.
Yance

Iceland 2 Chimeran Interior


About 30 m below ground or something rediculous lies the Chimeran Node Interior. I struggled with this. I won't lie. Chimeran architecture is an artform all it's own! At this point during my career I was hell bent on "characterizing" my environments. I say that because we're often in a hurry to create our environments and get them polished up. It's the nature of the beast. We ship a game a year and we pride ourselves on that! With the Node interior I attempted an experiment to make the entire level modular. In my opinion it was largely a success! But it came with many growing pains for me as an artist. I knew I had to make it modular if I wanted to characterize my pieces meaning I would take a little extra time on each piece and make it really special. This of course would not allow the time for a lot of pieces to be made so I worked with my designer to sort of balloon straw the level into manageable pieces. Balloonstrawing a level means that we break up the work load by creating high quality rooms seperated by modular corridors or whatever. Though this seams like it would be wholely linear gameplay it's actually quite easy to provide choice or the illusion of it with modular systems. Many of the columns were done with nice high to low models and the floors were a combination of that and zbrush. I've fully integrated zbrush into my environment pipeline as of the day of this writing and it all started by characterizing my environment. Some people knock modular systems and it's really a matter of preference. I can't say it's the optimal solution for every situation. But the Node was a very special place with very special circumstances and limitations. In the end the art turned out great and the experiment was worth the growing pains.

Resistance 2 Iceland 2


Iceland 2 was a massive undertaking. Two-thirds of which I'm not showing you here because the rest of my team burned rubber creating it. There was an army base battle, a natural battelfield, and the Node. I was tasked with everything Chimeran in the environment for this level. We again had a large land mark called The Chimeran Node. I have to give props to my buddy Jason Anderson http://www.jasoncanderson.com for helping me along with this. We started Resistance prototyping this bad boy and I finished it up. I enjoy these projects because they're challenging and sometimes I feel like a magician because I'm working every angle to create the illusion of granduer while still trying to work under the limits of our engine and budget. The Node was made up of maybe 20 pieces. Each was constructed in a way to provide the optimum amount of reuse. Of course one can see that this is created from like materials and modular parts. But the hope was that we could make each piece feel a little different than the next. This way we could provide quality art in very little time.

Twin Falls Towers Interiors


I wanted to add a couple shots of the interior. I'm not sure these hold up to code but I'm fairly certain I got it pretty close;).

Friday, August 14, 2009

Twin Falls Gun Towers


Twin Falls came with a special project. A set of massive gun towers protecting the region. These were a lot of fun to produce and took some innovative thinking on our part. In the end I think we captured the right scope and scale. Unfortunately due to time constraints we weren't able to do all that we hoped for in the towers. Maybe we'll revisit them again.

Sunday, July 12, 2009

Decal Work


During the final phase of production I was asked to do decals for our effects department. This for me was a wonderful opportunity because it really let me explore and learn something new. I did many different decals from explosions to bullet holes; and my personal favorite: blood splatter. The most interesting decal though was the bullet wounds I created for our soldiers and Chimera. I took special care in these because I really wanted them to look realistic. I did lots of gruesome research and with final reference I went into Zbrush and carved out several different gun shot wounds! It was some of the most fun i've had! From the sculpt I was able to extract every map necessary to give the wounds their proper depth! I never thought playing with blood could be so much fun!;)
Yance